
This chapter walks through the whole process with the default settings. Each step links to the chapter that covers it in depth.
1. Create a project
A project groups everything about one website: its configuration and all its crawls. The usual approach is one project per website or per client.
Click + New project in the sidebar.

- Leave the mode set to Spider (follows links).
- Type the Start URL, usually the home page:
https://www.yoursite.com/. - If you want, give it a Name (if you leave it empty, the domain is used).
- Click Create and crawl.
The default limits and speed (100,000 URLs, 8 concurrent requests, a 250 ms pause per server) are safe for almost any website. If you change something risky, such as removing the URL limit or no longer respecting robots.txt, the Before you start box appears and explains the consequences.
2. Follow the crawl
As soon as it starts, the header shows the progress bar with the URLs discovered, processed, queued, in progress, failed and blocked by robots.txt.
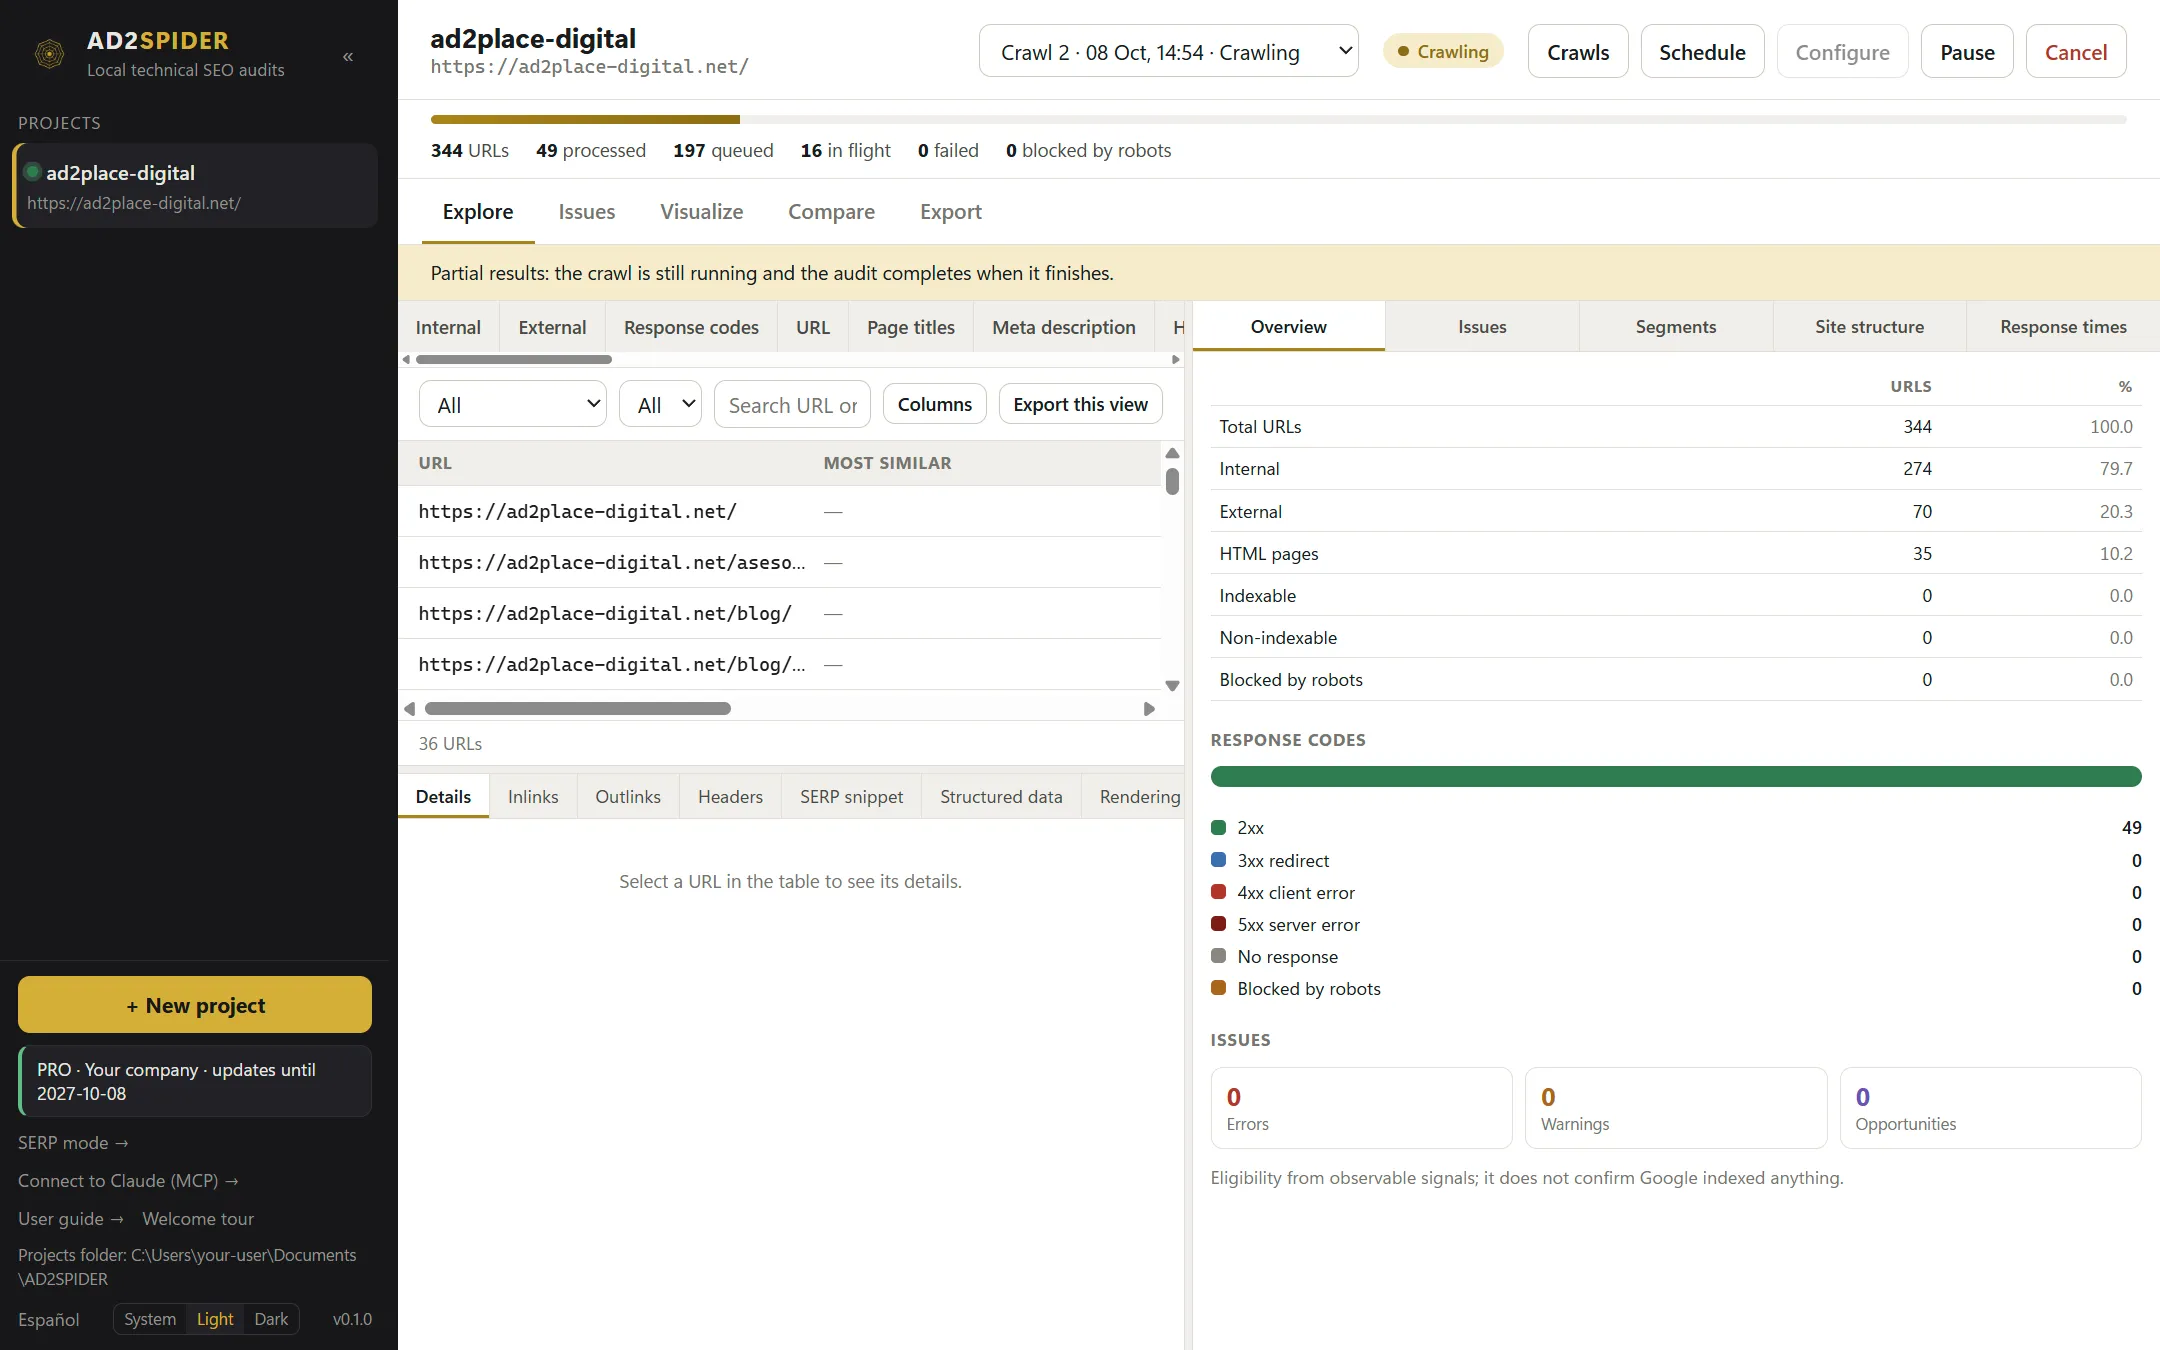
- You can explore the results while it crawls: the yellow notice reminds you that they are partial and that the full audit runs when the crawl finishes.
- Pause stops the crawl safely; Resume picks it up where it left off, even if you closed the app in the meantime.
- Cancel ends it for good: anything pending is discarded.
When it finishes, the status changes to Auditing… for a few seconds (this is when the issues that depend on the whole site are calculated, such as duplicates or orphan pages) and then to Completed.
3. Review the results
The Explore tab shows every URL with its data. Each tab in the top row (Internal, Response codes, Page titles, Images…) focuses on one aspect, and the filter drop-down includes the issues detected for that aspect along with the number of affected URLs.

- Click a URL to see its full details in the bottom panel.
- The right panel summarizes the crawl: response codes, indexability, issues by priority, folder structure and response times.
More in Explore.
4. Prioritize with Issues
The Issues tab brings together every issue, grouped into errors, warnings, opportunities and information. Pick one to see why it matters, how to fix it and the list of affected URLs with the evidence for each one.
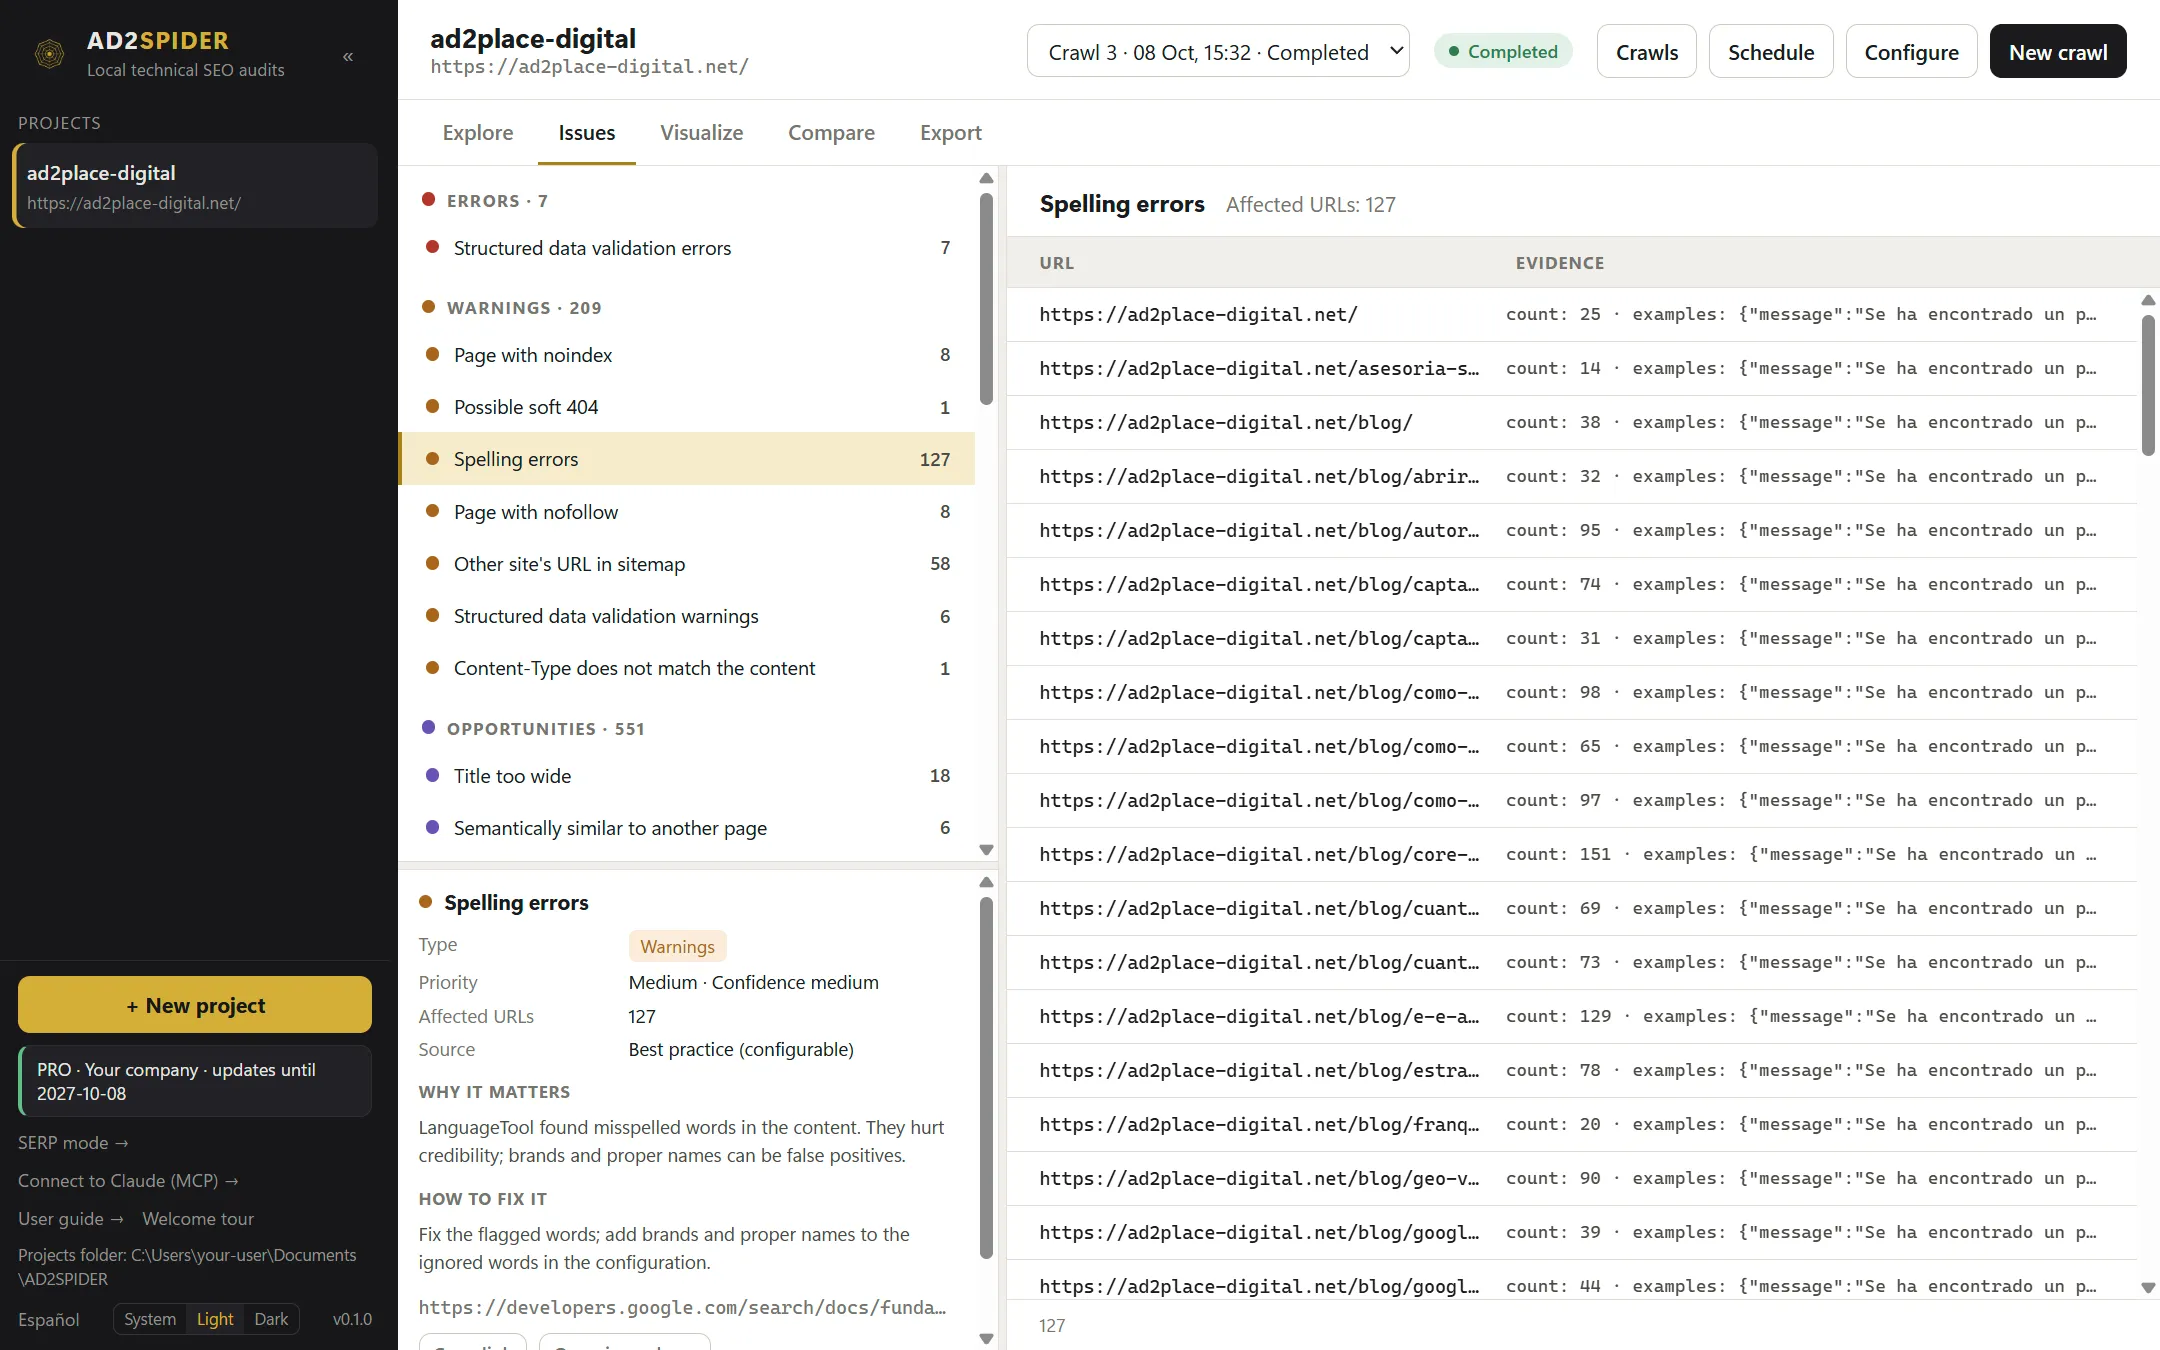
Start with the errors and, within them, with the ones that affect the most URLs. More in Issues.
5. Export and share
In Export you can download the URLs, the issues or the links in Excel, CSV or JSON, cross-reference reports (redirect chains, insecure content…) and an XML sitemap with the indexable pages. From the explorer, Export this view saves exactly what you have on screen. More in Export.
6. Crawl again and compare
Once the changes have been made, click New crawl: it runs again with the same configuration. In Compare you’ll see which issues have been resolved, which are new and which URLs have changed. More in Compare.
Next steps
- Adjust what gets crawled and how fast in Crawl configuration.
- If the site is built with React, Vue or Angular, turn on JavaScript rendering.
- Add PageSpeed, semantic analysis or AI to go beyond the technical side.
- Schedule recurring crawls from Projects and crawls.